Vintage

Wednesday, May 30, 2012

1st Birthday on a Budget: Part 2


Wow, I am really bad at this blogging thing! But hey, working and raising a family is hard work and let's face it, blogging isn't exactly top priority. That said, here's the rest of the Bear's 1st birthday.

Step 3: Pick a Menu ($30) & Make a Cake ($8)

Since we did a Razorback themed party we opted for game day food including hot dogs, beans, salad, and chips and dip. Not the healthiest of menus but hey it's a party. The key to food at a party is to keep it simple, inexpensive, and of course have the grandparents chip in a little. They kicked in a little when it came to the sides and we handled the rest. Super easy and cheap.

When it came to the cake, I tried to be ambitious and make one from scratch. Who knew that cake is next to impossible to get out of a custom cake pan without cake release? Not me. The first version failed miserably so I did what every good mom does and bought a mix ($2). The most expensive part of the cake ended up being the icing. I purchased a tub of plain white ($1) thinking I would get off cheap but lo and behold to get a quality red coloring I had to go to the cake decorating section. Let's here it for $5 for a small canister of crimson food gel. I know it's probably horrible for us and will someday give us cancer but I used it anyway. So now we are to a grand total of $8 for the cake. I guess in comparison to a store bought cake it's no big but it was more than I had expected.
Finished cake w/decorations (His name was across the top, again removed for privacy)

Step 4: Favors ($7)

For favors I opted for cookies and mints. The mints I had left over from a shower so they were free! For the cookies I borrowed some cookie cutters from my mother-in-law that were jersey and football shapes. I spent my $7 on the baking supplies, frosting (which I homemade), and the dye ($4). I had some red from the cake but had to buy the brown for the footballs. Again, good food dye is expensive.
I found the key to good cut out cookies is to cut them again after they bake. This gives you clean lines when you decorate and you get to munch on the crusts!
Fresh baked sugar cookie

Place cookie cutter over cookie and give one firm press

Result is clean cut cookies
The finished product (sorry I didn't get a pic of them decorated outside the bag)


Step 5: Presents ($40)

I feel like deciding on a gift is always the difficult thing. Do you go one big gift, several small, consider the party itself a gift and let the grandparents handle toys? Because it was so close to Christmas we opted to go very simple on gift. One gift for birthday and one gift for Christmas. The Christmas gift I snagged for $10 so that left us a little more to spend on birthday. While perusing the aisles at Target we came across this little darling and knew it was perfect for our little Bear.
Awesome Little People Batcave

So there you have it. 1st Birthday party for just under $100. 
Let's review shall we: Free (decor & cute outfit) +  $11 (invites) + $30 (Food) + $8 (Cake) + $7 (Favors) + $40 (Present) = $96

Wednesday, March 21, 2012

1st Birthday on a Budget Part 1

I realize that this post is more than 3 months overdue but hey a lot has transpired. We moved, Husband got a new job, I got a new job, Bear had a birthday, and we're expecting again. So there is a little slack to be cut.

So the Bear turned 1 a few months ago and did so on a very tight budget. Like most young families, we don't have an abundance of funds and that didn't miraculously change when the Bear's 1st birthday rolled around. We had to really think about what we wanted to do and how much we wanted to spend.

I started mapping this out and discovered that it was way to long for one post so I'll break it down into two. Part 1: Planning/Prep and Part 2: Party

So here are the guide so to speak of how I kept my son's birthday from start to finish for under $100.

Step 1: The Theme/Decor (Free)
I started planning my son's party while I was still pregnant. Call me crazy but doing so saved me some serious dollars when it came to the party. How so you may ask?
I saved the decorations from the baby showers!
We did an Arkansas Razorback themed nursery and so two of my showers were also Razorback themed. I saved napkins, streamers, wall hangings, stickers, plates, etc. Yes they took up a little closet space and yes my husband tried to throw things away a few times, but I hung on to it all! I also borrowed some decorations from the Bear's nursery and set out his baby book, photo albums, etc.


I didn't have to buy a single decoration and the space looked great.
Cute baby stuff

Banner from one of my showers

Pictures of the Bear over the last year
 

Step 2: The Invite List (Free) and Invitations ($11)

I know the tendency of 1st timers is to go overboard with the first birthday. Hey, I was in the same boat. If I could have, I would have gone all out and probably tried to get Tyler Wilson himself to come to the Bear's party (wouldn't that have been awesome)! But, again, reality set in.
Rather than inviting everyone we knew with kids, people from church, and every family member we could find, we kept it to our immediate family and a few close friends with kids.
I made the invites using a combo of stuff I already had and a few simple purchases
  • Wrapping paper from a shower
  • Brown scrapbook paper
  • "You're Invited" rubber stamp ($6 from Hobby Lobby)
  • 12 pk. of red envelopes ($3 from Hobby Lobby)
  • 12 printed pics of the Bear ($2 from Wal-Mart)
Here's the finished product. Not bad, eh? (The blackouts were obviously not on the actual invite, just personal stuff blocked for this post.)


Step 3: Super Cute Outfit for the Birthday Boy
Just like every mom I wanted by Bear to have a cute out fit to wear. Something that had a "1" or "Birthday Boy" or something similar on it. Truth be told I couldn't find exactly what I was looking for so I just made it myself. I am not a master seamstress so I assure you anyone can do this. I took a white onesie we already had and some material that was left over from covering a footstool in the nursery.
I cut out a one and zig-zag stitched around the edge. Done!


That's it for now. Still to come are The Food/Cake, The Favors, and The Presents.

I'm glad to be back in the blogging world after my brief hiatus.

Thursday, December 1, 2011

Brown Paper Packages

Growing up, the Sound of Music was my absolute favorite musical and of course one of the best songs is "My Favorite Things." Oh the wonderful things that come wrapped in brown paper and string. Okay, most things now-a-days don't come wrapped in brown paper. They come in bright wrapping paper, cellophane, and bags with balloons. But not this year at our house! We're kickin' it old school!

My first married Christmas I got creative and used newspaper and cloth ribbon for wrapping paper, but got busy and less creative the next two years. This year I decided not only would I get creative but also resourceful. Most of the grocery stores around here give you paper bags at the checkout. I had been saving them to reuse but then a light bulb went off. Ding! Use them for wrapping paper. Genius I know! So for the past few months I've been saving my paper bags and with all my Christmas shopping done (yeah, you heard me, done), I started wrapping today.

Let's go through this process together.

Step 1: Dismantle the bag. First remove the handles. You'll use these later for bows.

Then carefully take the bag apart at the seams. I chose to do this to save every scrap I could but you can also just cut it apart. No big.
Step 2: Lay it out and wrap up your gift. I highly suggest either turning your edges under so no rough edges or you could just trim up the edges.

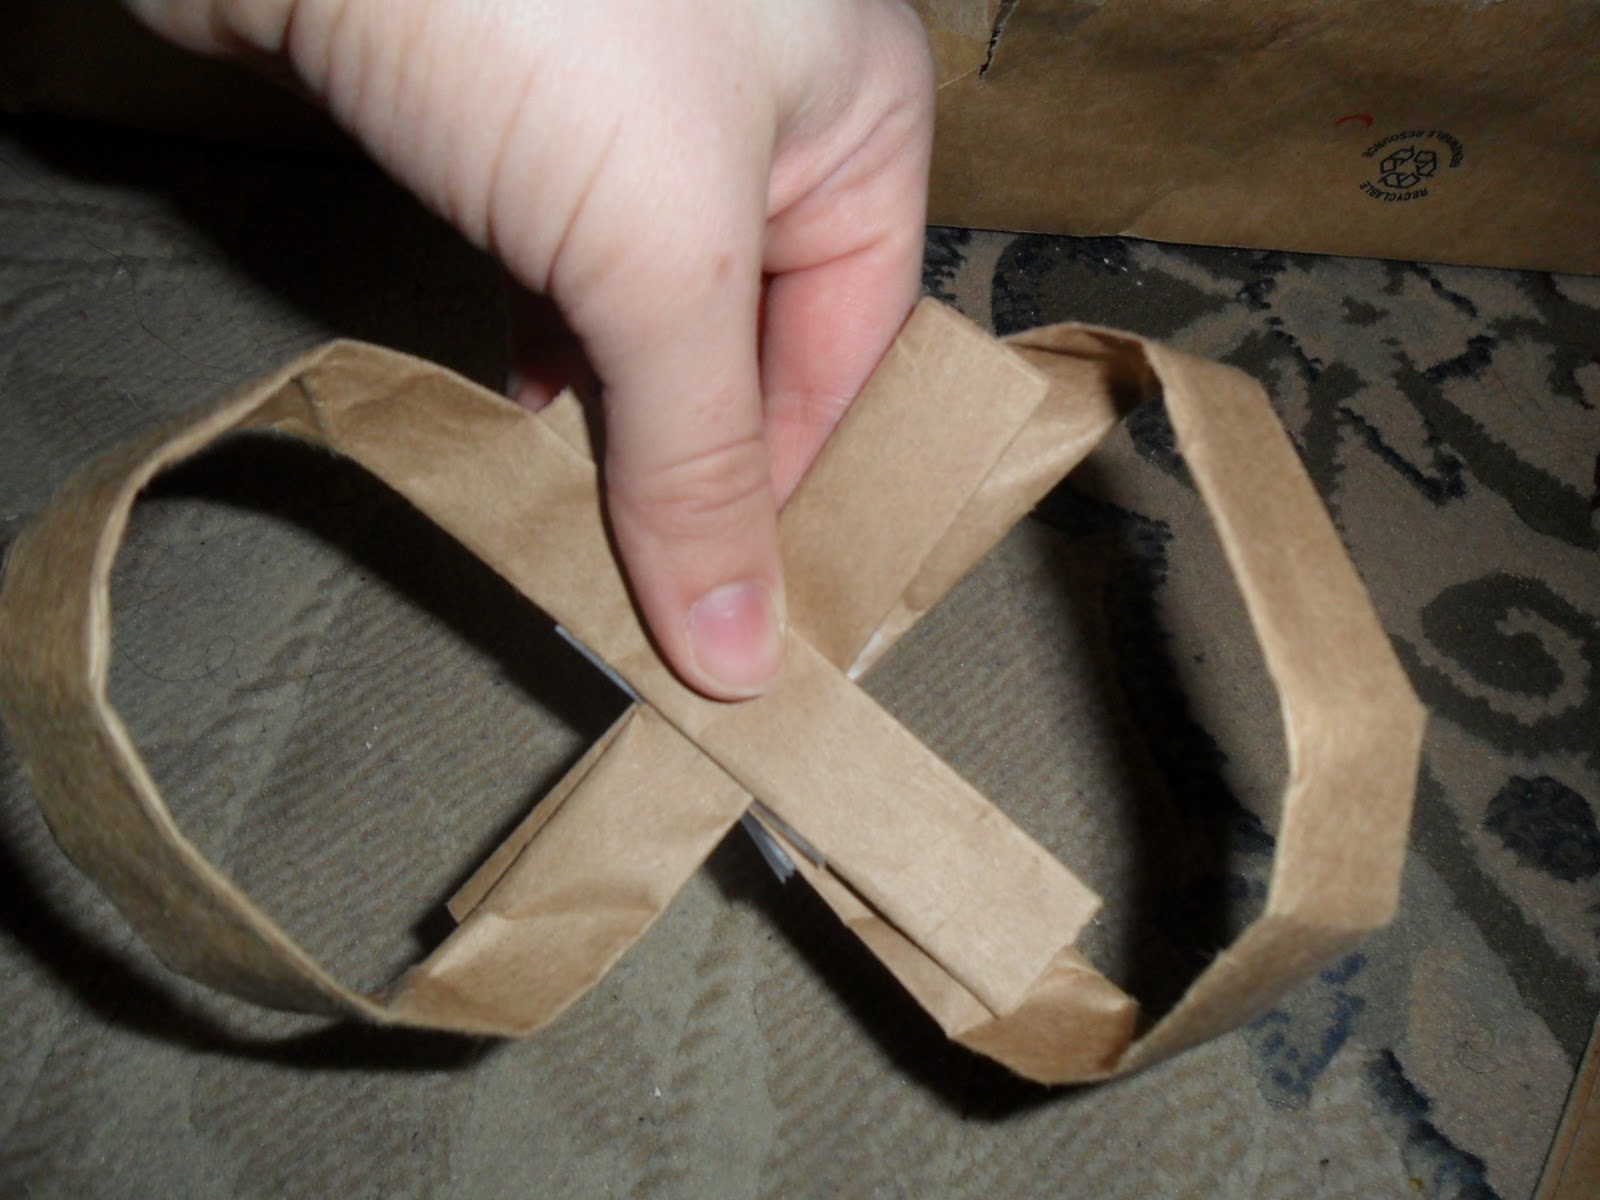
Step 3: Make the bow. Take one of the handles and bend it the opposite direction that it was on the bag. This creates a loop. You'll need to smooth it out slightly.


Next place a piece of tape on the back side of the bow so that it doesn't show.
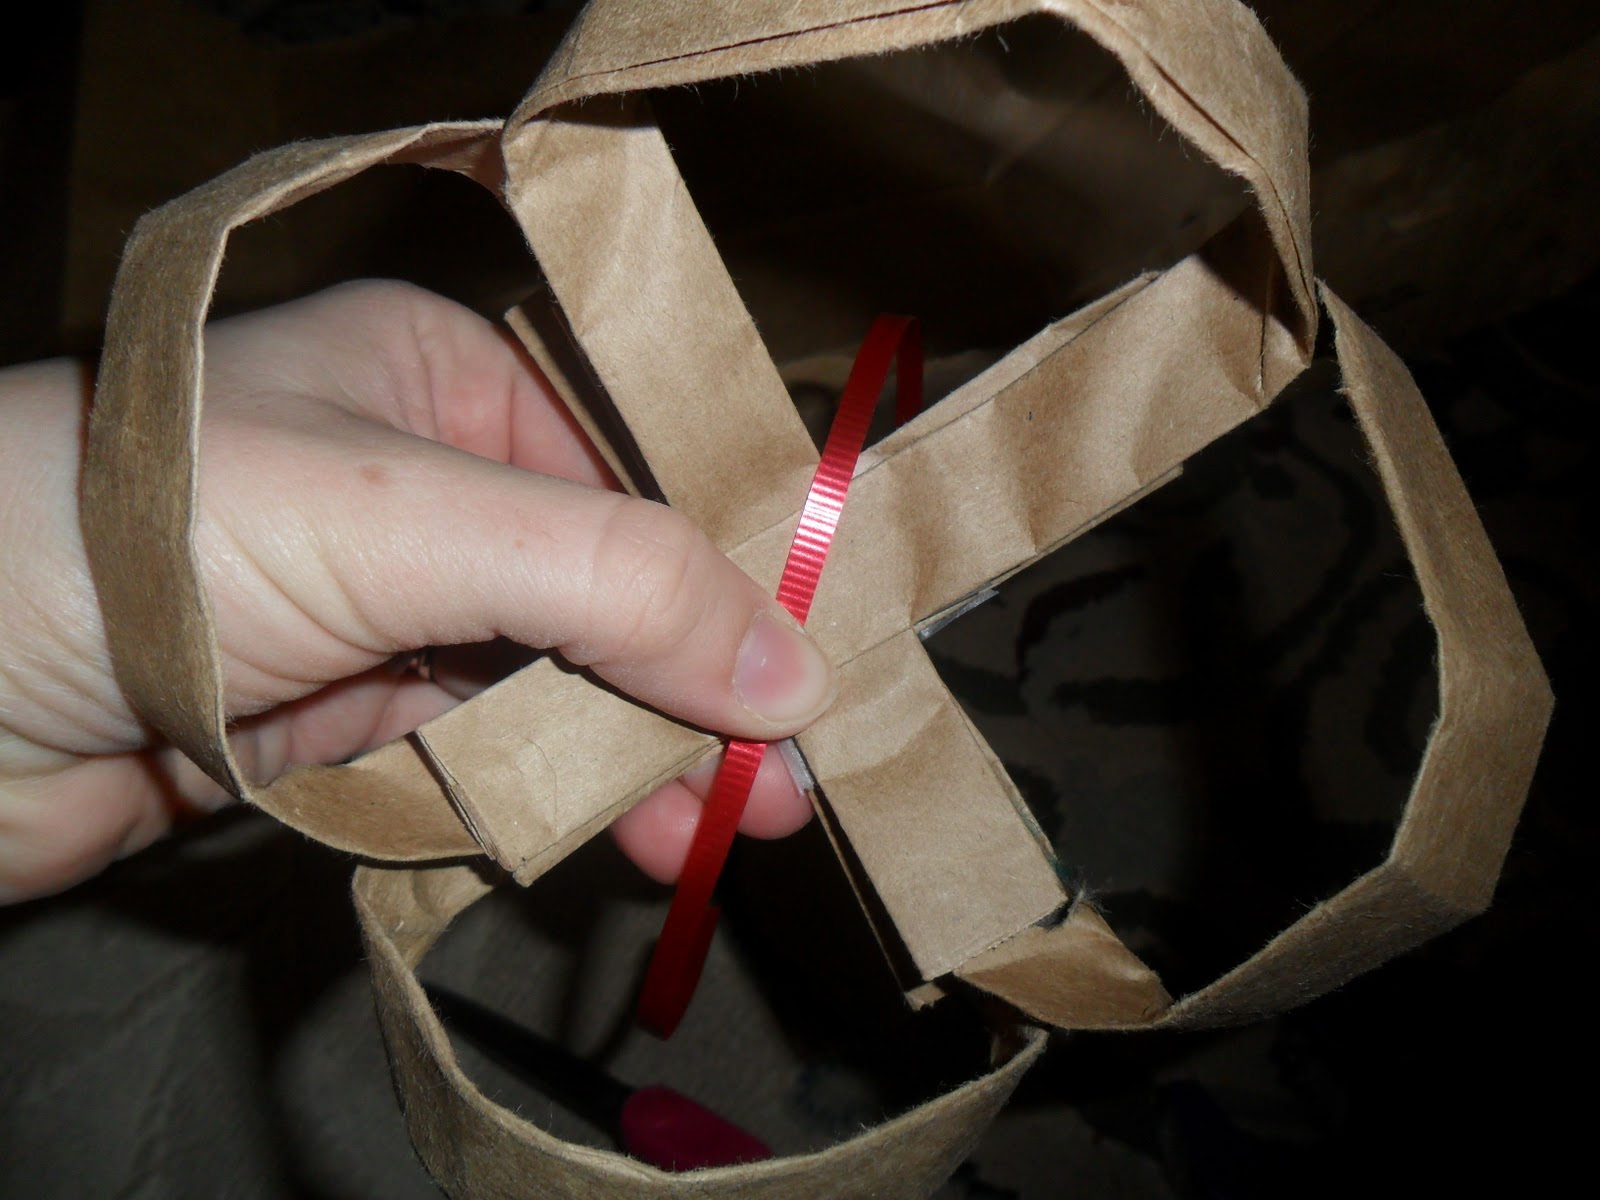
Now repeat this with the other handles. You can add as many as you like to your "bow cluster."


I chose to use four "bows." To secure them together, I took a small red ribbon and tied it around all of the bows.


Now all there is left to do is fancy up the bow a bit and attach to the wrapped package.

Step 4: Enjoy brown paper packages tied up with string!


All in all I'm fairly pleased with the outcome. If I had it, I would use wider ribbon to cover up the tape on the sides or better yet use the clear tape designed not to show.

I know it's early, but I'm glad I have my packages wrapped and under the tree. With the bear's birthday next week, I have to be on the ball with things so it will be smooth sailing until Christmas.

Check out my husband's lovely gift wrapping!
It's moose...or a reindeer...I'm not sure.

Tuesday, November 22, 2011

Trying out Deceptively Delicious

Okay so it's been a while (a long while) since I've posted. I was supposed to be doing a comfort food series which totally tanked. Oh well. We've been super busy around here but I have been trying new things, just not posting about them.
Update on the dress project: it's way harder than it looks to make a dress from scratch. I pieced everything together, thought I was almost finished but my fitting keeps coming out wrong. So this project has been put on hold until I gain more patience.
In the meantime I have been working on something a little less complicated. As a shower gift I received Deceptively Delicious by Jessica Seinfeld. Basically it's a book of normal recipes that add vegetable and fruit purees to normal foods. I've heard good things about it, so once the bear got big enough to start eating table foods, I knew I had to try. So far we've tried french toast, oatmeal (a big hit), grilled cheese, and mac and cheese.
The little man has really enjoyed all the recipes and so have the hubby and me. We've made the oatmeal which uses canned pumpkin several times. Yum!
I knew I wanted to start small when it came to purees, so when cauliflower went on sale I figured it was the time to start.

So here it is, my adventure into purees and the resulting mac and cheese.
The book outlines how to do the puree which is relatively easy so until I have pictures documenting how to do the purees, I'll skip this step.

Here's the mac and cheese recipe.
1 1/2 cups elbow macaroni (I used whole wheat spiral pasta)
Nonstick cooking spray
1 Tbs. olive oil
1 Tbs. all-purpose flour
1/2 c. non-fat (skim) milk (I used 2% cause it's what we had)
1/2 c. butternut squash or cauliflower puree
1 1/2. shredded cheddar cheese
4 oz. cream cheese
1/2 tsp. salt
1/8 tsp. paprika
1/8 tsp. pepper

Cook pasta according to package directions. This is also a good time to defrost your puree if using it from frozen.
My frozen cauliflower puree. I used "Fresh Baby" trays but ice cube trays work too. Five cubes is 1/2 cup.
While the pasta cooks, coat a large saucepan with cooking spray and heat over medium high heat. Add the oil, then the flour, and cook, stirring constantly, until mixture resembles a thick paste but has not browned, 1 to 2 minutes. **Be sure to cook this the whole time suggested. I didn't and the final product tasted to flour-y.

Add the milk and cook, stirring every now and then, until the mixture begins to thicken, 3 to 4 minutes. Add the vegetable puree, cheeses, and seasonings, and stir until the cheese is melted and the sauce is smooth. Stir in macaroni and serve warm.
Final creamy product
A few notes, like I said make sure you really follow the step about the flour. All in all the little bear liked it a lot. I fix a lot of mac and cheese for his lunches so I'm really glad I found a recipe that adds a little extra nutrition.
You can judge for yourself, but I think he enjoyed it.