Vintage

Thursday, December 1, 2011

Brown Paper Packages

Growing up, the Sound of Music was my absolute favorite musical and of course one of the best songs is "My Favorite Things." Oh the wonderful things that come wrapped in brown paper and string. Okay, most things now-a-days don't come wrapped in brown paper. They come in bright wrapping paper, cellophane, and bags with balloons. But not this year at our house! We're kickin' it old school!

My first married Christmas I got creative and used newspaper and cloth ribbon for wrapping paper, but got busy and less creative the next two years. This year I decided not only would I get creative but also resourceful. Most of the grocery stores around here give you paper bags at the checkout. I had been saving them to reuse but then a light bulb went off. Ding! Use them for wrapping paper. Genius I know! So for the past few months I've been saving my paper bags and with all my Christmas shopping done (yeah, you heard me, done), I started wrapping today.

Let's go through this process together.

Step 1: Dismantle the bag. First remove the handles. You'll use these later for bows.

Then carefully take the bag apart at the seams. I chose to do this to save every scrap I could but you can also just cut it apart. No big.
Step 2: Lay it out and wrap up your gift. I highly suggest either turning your edges under so no rough edges or you could just trim up the edges.

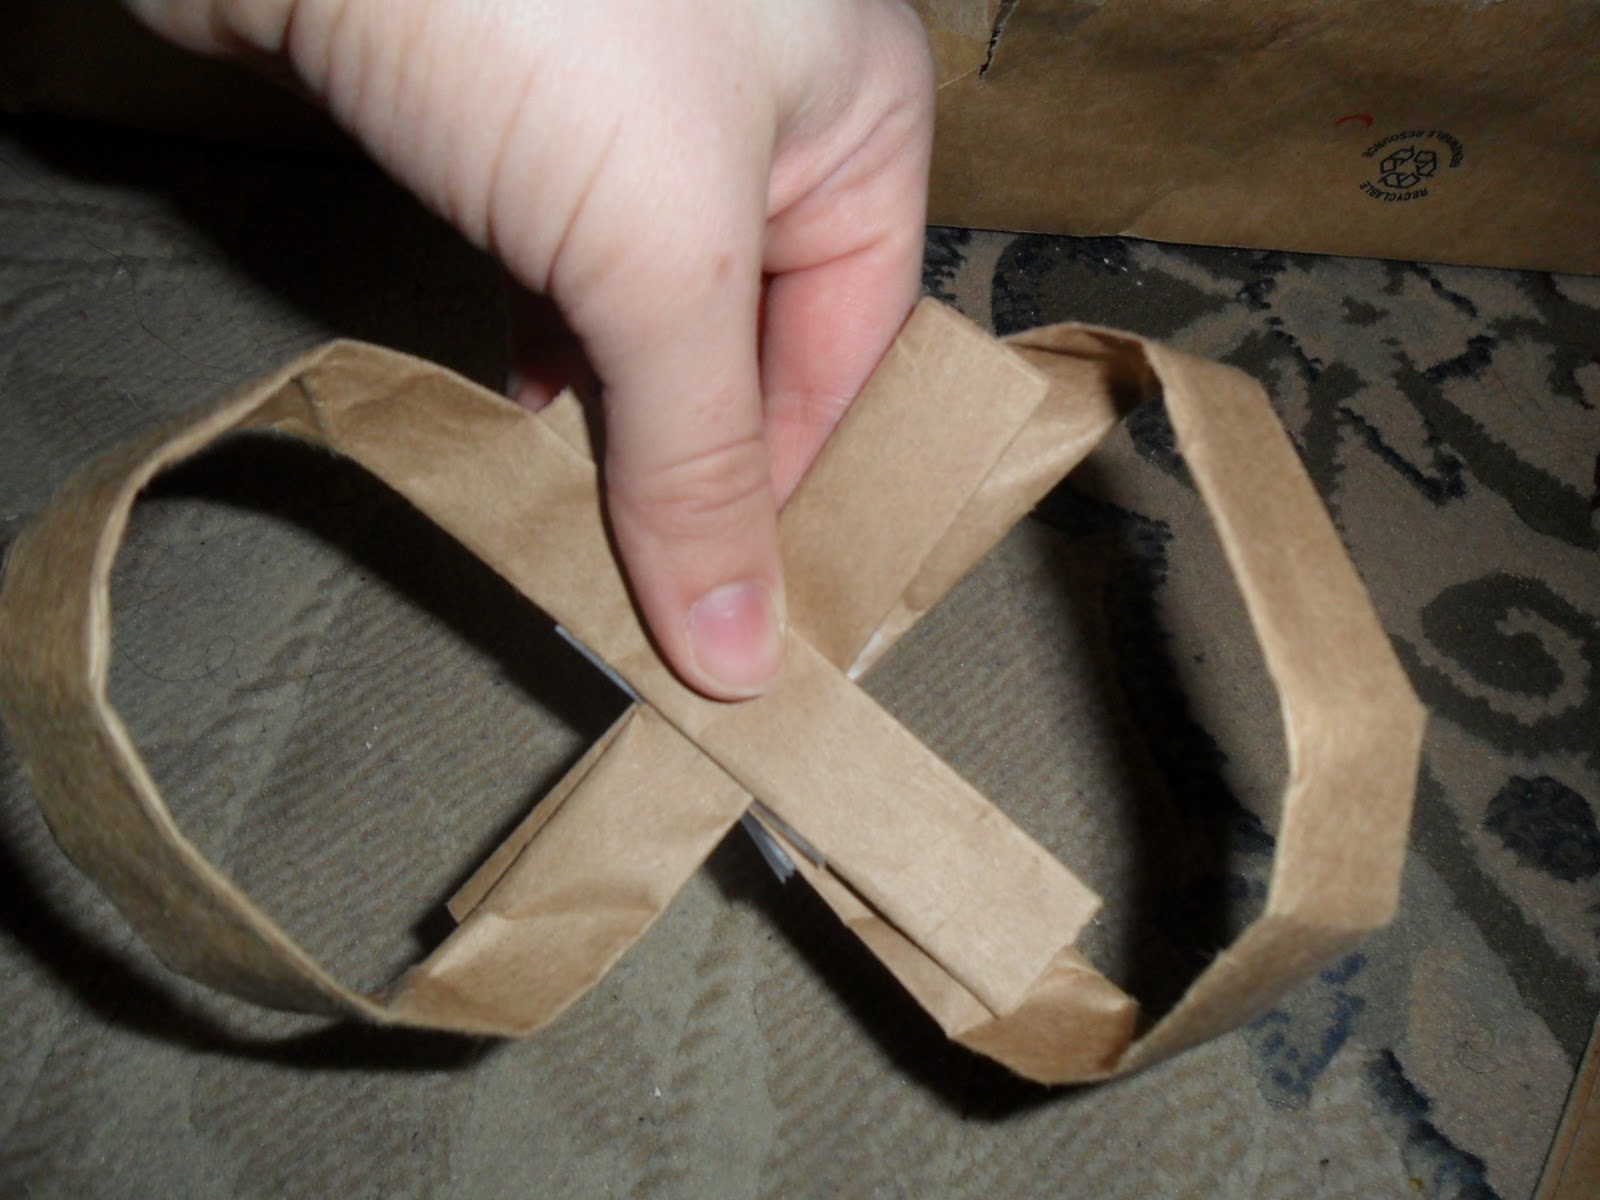
Step 3: Make the bow. Take one of the handles and bend it the opposite direction that it was on the bag. This creates a loop. You'll need to smooth it out slightly.


Next place a piece of tape on the back side of the bow so that it doesn't show.
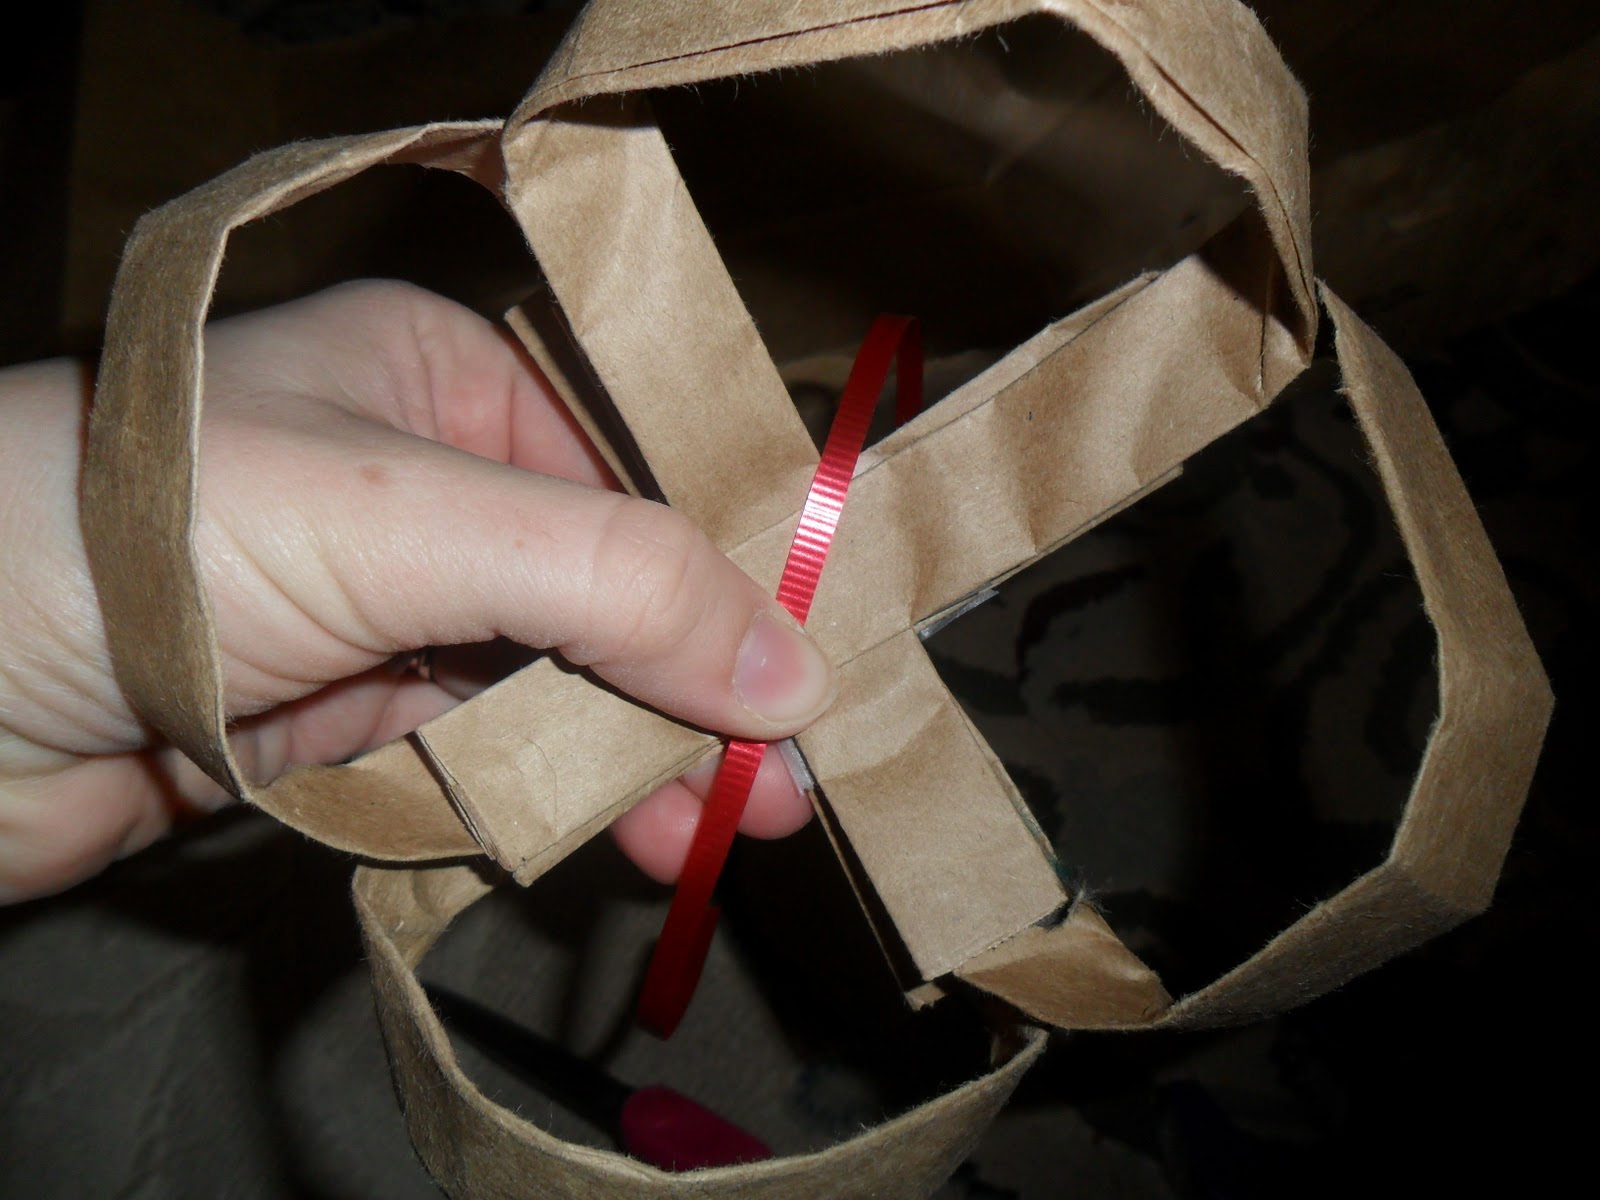
Now repeat this with the other handles. You can add as many as you like to your "bow cluster."


I chose to use four "bows." To secure them together, I took a small red ribbon and tied it around all of the bows.


Now all there is left to do is fancy up the bow a bit and attach to the wrapped package.

Step 4: Enjoy brown paper packages tied up with string!


All in all I'm fairly pleased with the outcome. If I had it, I would use wider ribbon to cover up the tape on the sides or better yet use the clear tape designed not to show.

I know it's early, but I'm glad I have my packages wrapped and under the tree. With the bear's birthday next week, I have to be on the ball with things so it will be smooth sailing until Christmas.

Check out my husband's lovely gift wrapping!
It's moose...or a reindeer...I'm not sure.

Tuesday, November 22, 2011

Trying out Deceptively Delicious

Okay so it's been a while (a long while) since I've posted. I was supposed to be doing a comfort food series which totally tanked. Oh well. We've been super busy around here but I have been trying new things, just not posting about them.
Update on the dress project: it's way harder than it looks to make a dress from scratch. I pieced everything together, thought I was almost finished but my fitting keeps coming out wrong. So this project has been put on hold until I gain more patience.
In the meantime I have been working on something a little less complicated. As a shower gift I received Deceptively Delicious by Jessica Seinfeld. Basically it's a book of normal recipes that add vegetable and fruit purees to normal foods. I've heard good things about it, so once the bear got big enough to start eating table foods, I knew I had to try. So far we've tried french toast, oatmeal (a big hit), grilled cheese, and mac and cheese.
The little man has really enjoyed all the recipes and so have the hubby and me. We've made the oatmeal which uses canned pumpkin several times. Yum!
I knew I wanted to start small when it came to purees, so when cauliflower went on sale I figured it was the time to start.

So here it is, my adventure into purees and the resulting mac and cheese.
The book outlines how to do the puree which is relatively easy so until I have pictures documenting how to do the purees, I'll skip this step.

Here's the mac and cheese recipe.
1 1/2 cups elbow macaroni (I used whole wheat spiral pasta)
Nonstick cooking spray
1 Tbs. olive oil
1 Tbs. all-purpose flour
1/2 c. non-fat (skim) milk (I used 2% cause it's what we had)
1/2 c. butternut squash or cauliflower puree
1 1/2. shredded cheddar cheese
4 oz. cream cheese
1/2 tsp. salt
1/8 tsp. paprika
1/8 tsp. pepper

Cook pasta according to package directions. This is also a good time to defrost your puree if using it from frozen.
My frozen cauliflower puree. I used "Fresh Baby" trays but ice cube trays work too. Five cubes is 1/2 cup.
While the pasta cooks, coat a large saucepan with cooking spray and heat over medium high heat. Add the oil, then the flour, and cook, stirring constantly, until mixture resembles a thick paste but has not browned, 1 to 2 minutes. **Be sure to cook this the whole time suggested. I didn't and the final product tasted to flour-y.

Add the milk and cook, stirring every now and then, until the mixture begins to thicken, 3 to 4 minutes. Add the vegetable puree, cheeses, and seasonings, and stir until the cheese is melted and the sauce is smooth. Stir in macaroni and serve warm.
Final creamy product
A few notes, like I said make sure you really follow the step about the flour. All in all the little bear liked it a lot. I fix a lot of mac and cheese for his lunches so I'm really glad I found a recipe that adds a little extra nutrition.
You can judge for yourself, but I think he enjoyed it.

Friday, September 16, 2011

Comfort Food Series: Chicken and Dumplings

So to keep myself motivated to blog bi-weekly if not more frequently, I decided to do a series. And what better thing to write about than food, comfort food!

To start I wanted to do my favorite comfort food: chicken and dumplings. I think everyone has their own variation of this recipe and it's always "the way mom made it." So for me this is the way my mom made and my grandma taught her to make it. It's quite the legacy so you should feel honored that I am sharing this time-honored recipe with the public.

The way my mom cooks is by touch and feel and if she actually has a written recipe, the actual product is probably some variation. This recipe is one that is not written down or at least I sure have never seen a written copy. So again feel honored that you get a written copy!
Here it is my version of Chicken and Dumplings.


What you need:
Leftover whole chicken (still on bones) or 4-6 chicken thighs (raw or cooked)
3-4 cubes chicken bouillon
1 1/2-2 quarts water
Flour
shortening or fat from chicken broth (preferred)
warm chicken broth
salt and pepper to taste

What you do:
There are a few ways to make your broth.
1. Raw chicken: Cook chicken in water with bouillon in crock pot on low all day. Feel free to add your own extra spices such as salt, pepper, fresh or powdered onion. At the end of the day, remove all chicken (meat and bones) from broth and set aside. Run broth through fat separator or something that will remove any bits of bones/meat and allow broth to sink and fat to rise. Leave in fat separator or put in another container. Refrigerate overnight to allow broth sink and fat to harden. Meanwhile, let chicken cool enough to handle. Separate chicken from bones and store chicken. All this can be done same day if desired.
2. Leftover cooked chicken (my preferred method): Using leftover baked chicken, remove as much meat from the bones as possible without completely dismantling the chicken. Place chicken in large stock pot and cover with water. Add bouillon. Cover and let simmer for 2-3 hours until chicken and bones separate. Remove meat and bones from broth. Run broth through fat separator and remove usable meat from bones. No need to store broth if using right away.
*If you don't want the hassle of making your own broth simply buy ready to eat chicken and canned broth.

Now that you have both broth and chicken, get to work on the dumplings.
Boil broth in large pot. Broth needs to be a full rolling boil before adding dumplings.
Dump about 1 c. flour in a mixing bowl. (1 c. of flour makes about 6 servings of dumplings) Cut in shortening or chicken fat from top of broth and make a course crumble. (Using the chicken fat instead of shortening gives the dumplings more flavor and you use all of your resources). Add enough warm broth to form a soft, elastic dough. Dough will be fairly sticky. Put half of dough on lightly floured surface. Need very gently so that dough maintains elasticity and softness. Roll out thin into rectangle.

Using a butter knife, cut into 1" strips. 

Cut in half.
Gently take strip. Stretch slightly and drop into boiling pot of broth.
Repeat with other half of dough. Let dumplings cook 5-7 minutes in boiling broth.
To thicken your "sauce" take about 1/4 cup of broth from the pot and whisk in 1/4-1/2 c. flour depending on how thick you want it and how much liquid you have. Return mixture to pot and allow to cook over medium heat. Be careful not to keep on too high of heat or dumplings will stick. Cook until desired thickness.

And that's it. This was surprisingly harder to put on 'paper' than I anticipated. Chicken and dumplings is one of those recipes I grew up making and I've never really thought about how to actually do it. I really hope I haven't missed any steps!


*Next post: Hamburgers with homemade buns!

Friday, September 9, 2011

What sparked my 'Pinterest'

So I've been hearing about Pinterest. Several blogs I follow wrote about it and I finally had a friend sit me down and actually look at it. I was little skeptical, but then I just dove in and I love it.
I can find so much stuff! I've really been looking for Razorback baby room ideas, but they are few and far between. Other than that I'm just having fun looking through other people's pins.

Pinterest is a great way to get a lot of ideas in one place. It sure is better than me googling topics and hoping to find at least something worth while. I haven't pinned much but I've found great stuff already.

If for some reason you want to follow my pins click here. But I suggest giving me some more time before you really check me out!